OBSERVATORY & EQUIPMENT
Observatory
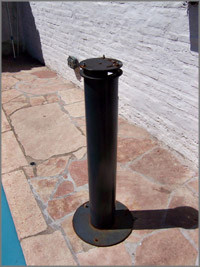
Well… that is the result after negotiations with my wife Silvina. Actually more than an observatory is just a site with a Pier at the border of the swimming pool in my backyard. Although the location is a bit risky, it is a convenient place for the rig.
The pier is placed directly in the basement. There are a bunch of people who used to build a block of cement below undergraound, that was tIMAGE
PIER
For the economic point of view, the fact that Vixen offers the mount without a tripod, was a good reason to place a pier instead of buying the tripod and also saving some extra bucks, considering the fact that bringing back the tripod to Argentina will worth an extra freight and 50% taxes.
As a different with many users who use to build such things, the cement or concrete basement was not implemented. Only three small holes with females screw were placed.
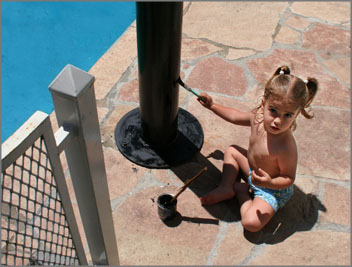
In the right picture my baby daughter Agustina helping me with some brushes to the pier.
Schematics
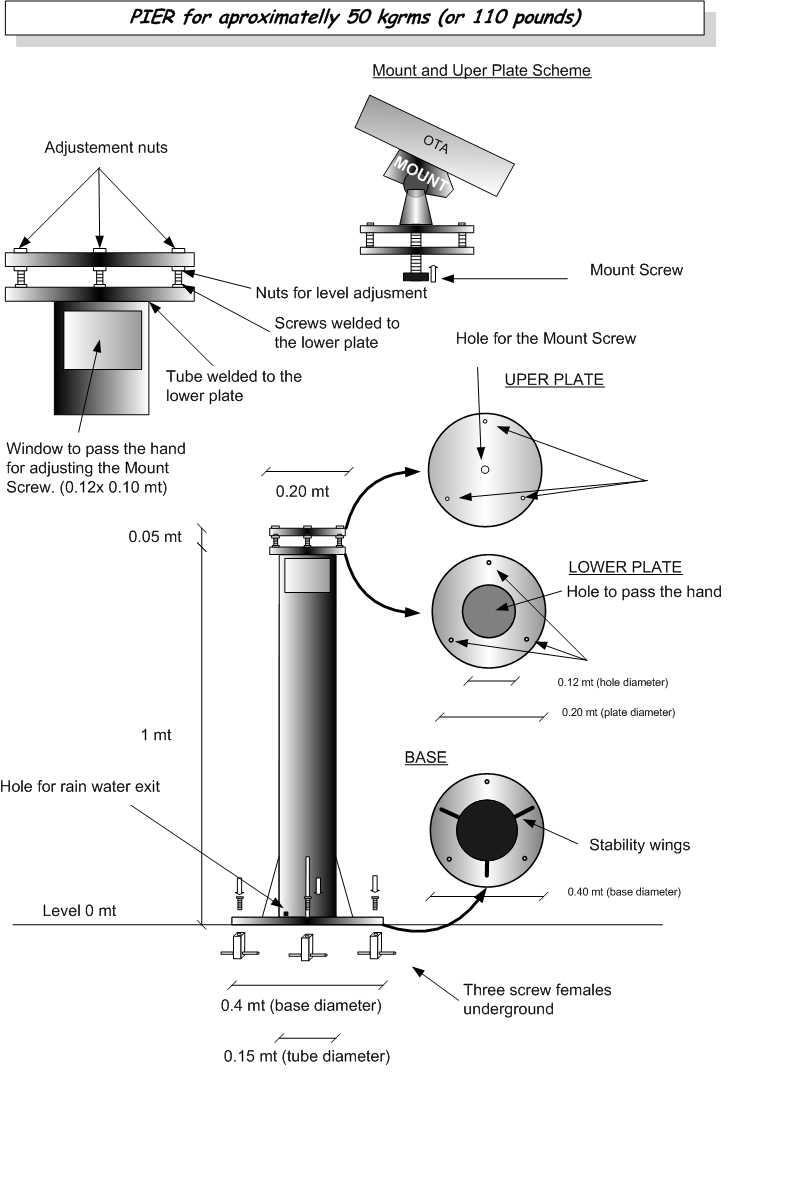
There is a JPG file available for anyone who wants to look at. Click in the picture for better resolution
Comments
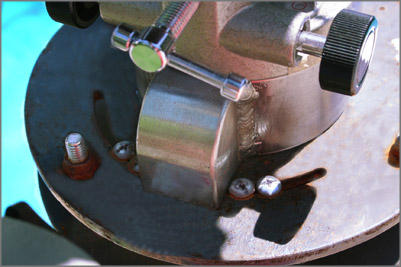
The Pier tube is 1 meter height but that’s up to the user. On the top it had two plates. One fixed to the tube and the upper one mobile to be adjusted to the horizontal plane. For this purpose there are three screws welded to the lower plate and each screw has two bolts. The upper plate is between the two bolts. Screwing or unscrewing the bolts the upper plate reaches the horizontal plane quite easily.
There is a small “window” in the tube. Its purpose is to pass the Mount screw and for locking the Mount to the upper plate.
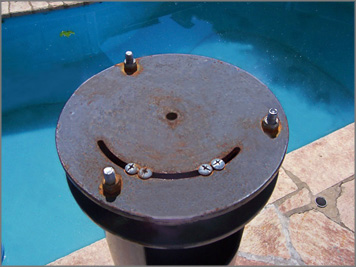
Plate lock guide
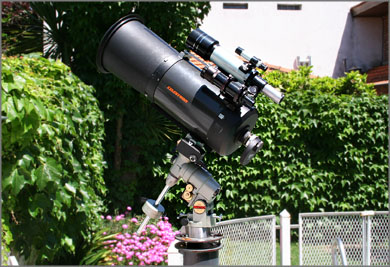
To place the mount in the polar aligned position, the plate was drilled with a kind of “smile shaped” fringe. (see the picture at the centre). Four screws were placed. Two in each side. In the middle there is a space just to fit the guide of the mount base (see the aluminum base in the right figure). The base the mount adapter was done by a craftsman. This system gives a pretty much solid alignment position. However from time to time is convenient to check and perform if necessary a drift alignment.